When most people think of this album, they think “wall of schmaltz” or “the one that Johnathan King ruined”. I usually try to defend the songs on this album, but I usually forget that when I listen to it, I’m hearing a heavily edited version that I carved up in an audio editor. To quote Peter Gabriel from the “Plays Live” liner notes: “This is called cheating”.
The editor I used is called Cool Edit Pro, which was bought by Adobe some time ago and is now Adobe Audition. I’m fairly certain that this method will also work in another audio editor like the free Audacity. I was able to cut out and eliminate most of the tape hiss in the original recording, and EQ it so that it no longer sounds so tinny and weak. The most crucial change I was able to make was to lower the volume of the overdubbed strings and horns. I’ll explain the entire process here.
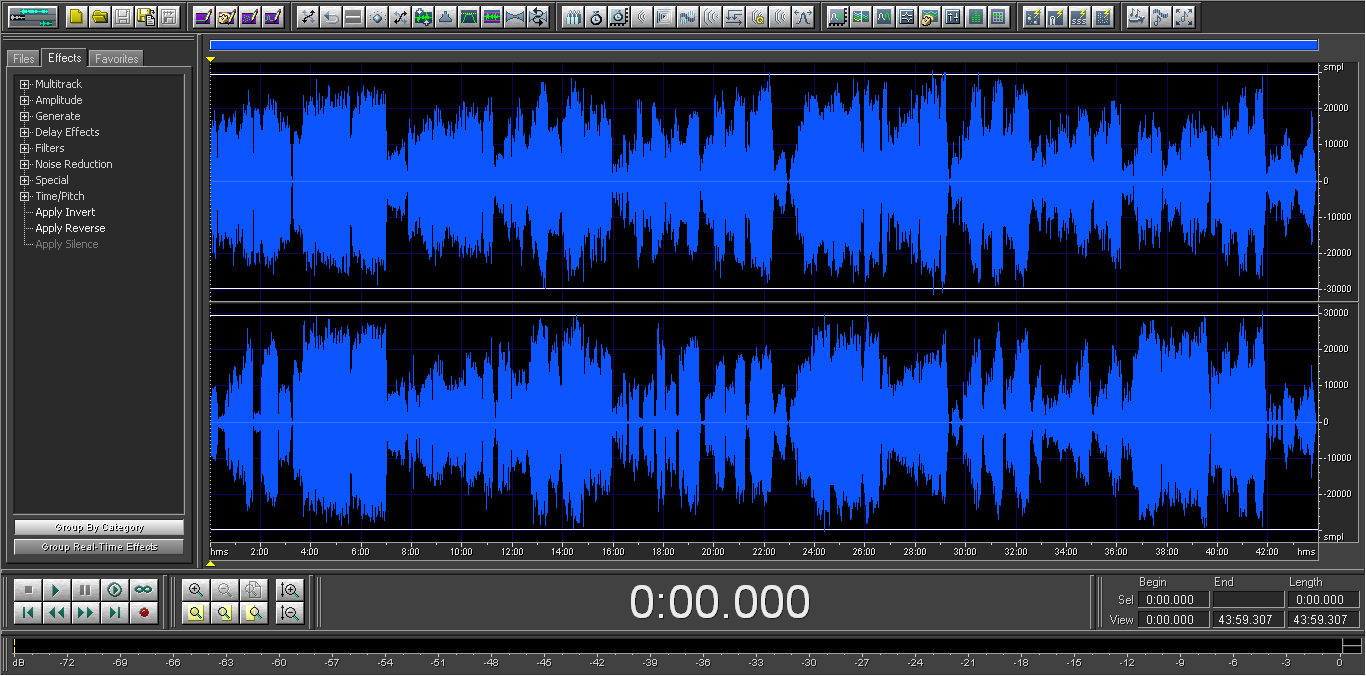
First, you have to rip your CD copy, and I recommend ripping the entire album as one track. Once you’ve done that, load the file into your audio editor.
Next, you must do the noise reduction. For this particular album, there is a stretch of only tape hiss at the end of “The Silent Sun”.
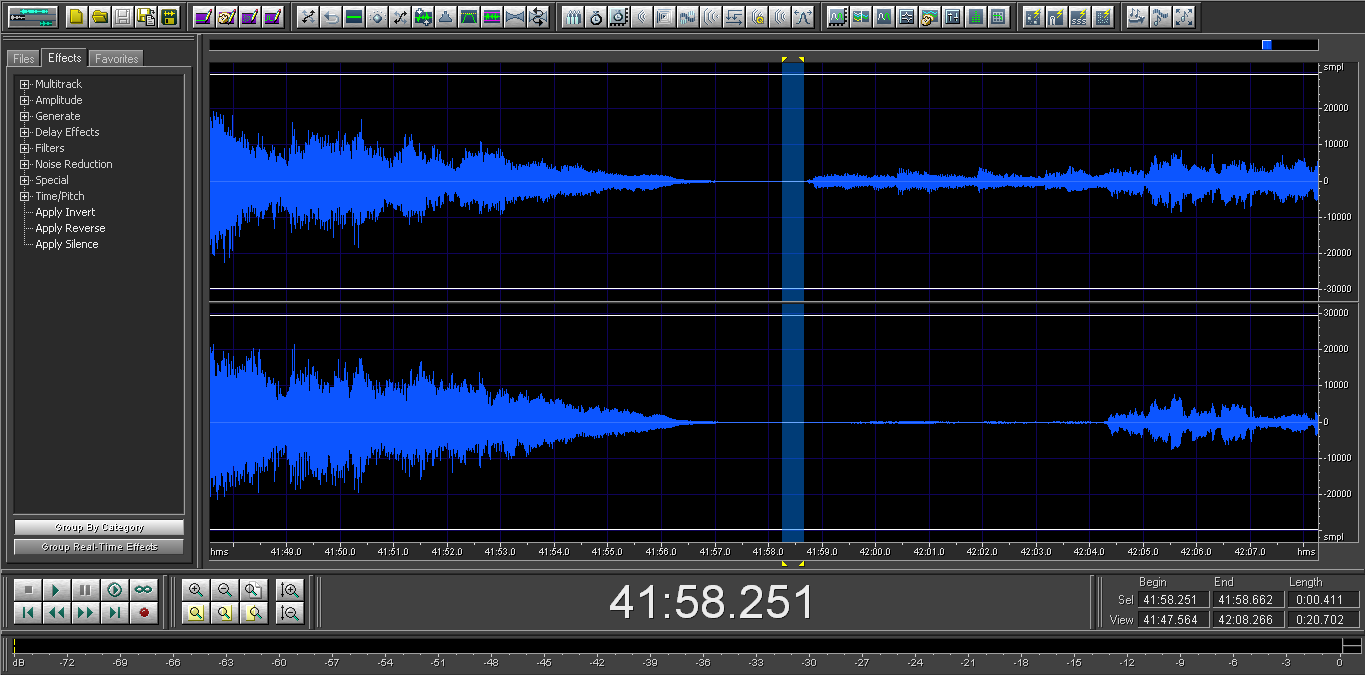
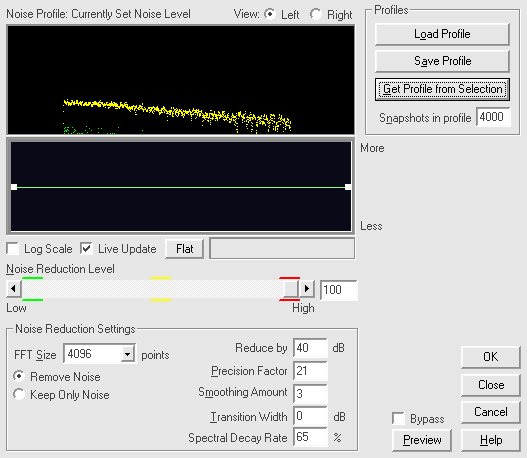
Select that part (making sure it’s only tape hiss and doesn’t contain any music – wear very good headphones or earphones) and go to the noise reduction plugin.

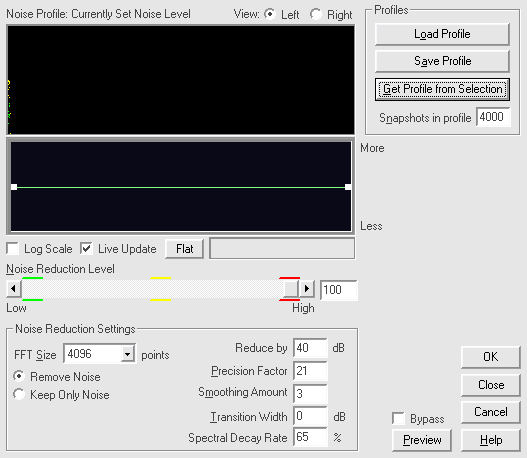
Click on “Get Profile from Selection”. This tells the editor what the noise sounds like. Set up the other settings similar to or the same as I have them in the above screenshot. Then select the entire waveform and apply that noise reduction to it. This will take a while, depending on how powerful your computer is. Mine took about ten minutes.
Now find a portion of the waveform with a lot of electrical hum still present. There is some about 18 minutes in.
Select a portion of that sound with very little else happening, and very little low-frequency instruments in particular. Copy and paste that selection into a new waveform. Then use the FFT filter to eliminate all but the low electrical hum frequencies from that selection.

The square points in the graph area can be clicked and dragged. The “hum 1 isolate” preset I already had happened to isolate the electrical hum perfectly. Get a noise reduction profile from this sample:
And apply it to the entire waveform. This took another ten minutes for me.
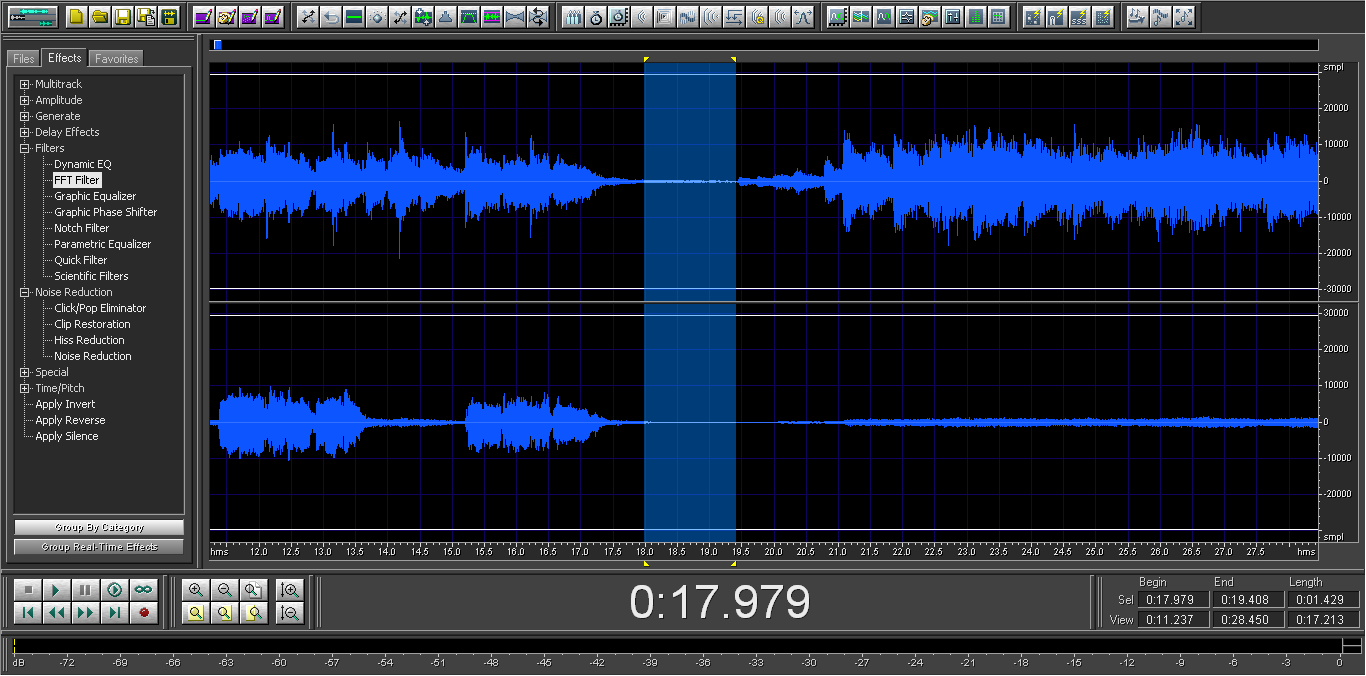
Next, isolate an area of sound with low sounding instruments and some leftover high-sounding hiss. There is such an area around 8 minutes in.
Use the same process: copy and paste the selection, and use the FFT filter. This time, use it on the higher end of the frequency range:
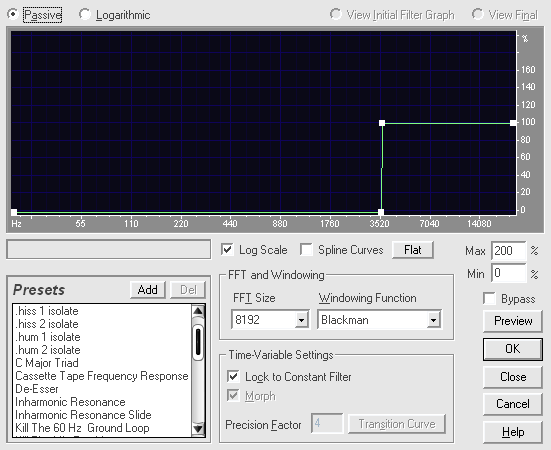
Be careful not to include any of the high frequencies of musical instruments in this sample, just noise. Use the noise reduction plugin on this sample too:
And apply it to the entire waveform.
You will notice how clear the album sounds with all the noise removed, but we’re not done yet. Next comes EQing. In Cool Edit, go to the Quick Filter.
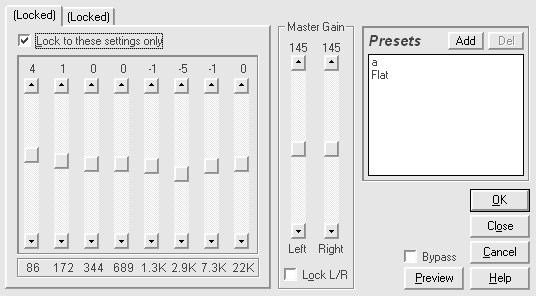
This is an 8-band EQ, and it is sufficient for the first step. That screenshot shows the exact settings I used for this album. EQing is also a matter of preference, so if you don’t want as much bass, or prefer to leave some of the tinny sound intact, you can change that. Note also the Master Gain setting which adds amplitude.
The Second part of the EQing process uses the Graphic Equalizer.


I have presets saved, but you can see that only two frequency ranges are adjusted here – one by 8 dB and one by 16 dB. Apply this to the waveform.
This next part is a lot of manual work, but it’s what lessens the volume of the strings and the horns. (You might have noticed too that after EQing the horns and strings do not sound nearly as loud as they did before.) Thankfully, when the original album was mixed, the horns and strings were kept on one stereo channel, usually the right. Thanks to this circumstance, we can use the Channel Mixer plugin:

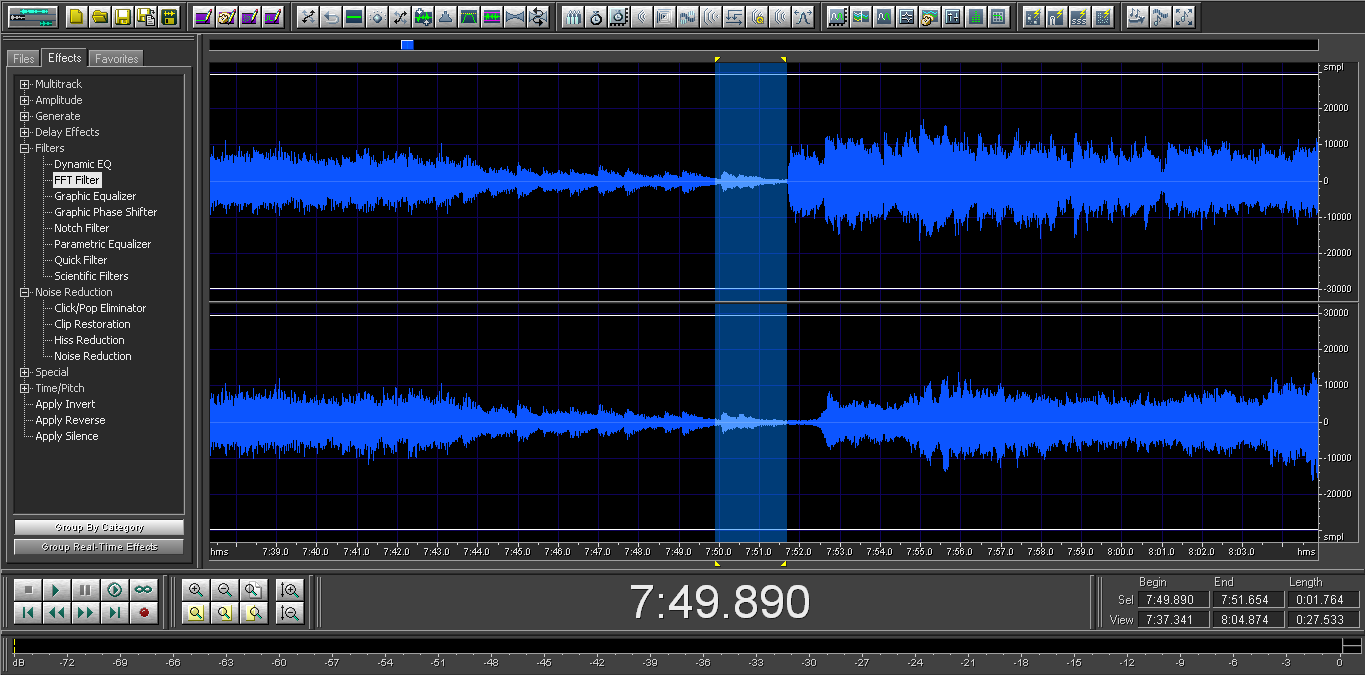
You will need to select each song with strings and horns and fine-tune the starting and stopping points of the edits yourself. Here’s a tip: the Begin and End fields of the selection in the bottom right of the application can be copied & pasted from and to.
Leave the channel without strings and horns at 100%. Mix the channel with strings and horns to whatever sounds good to you. Reducing that original channel to 40% and mixing in 60% of the unaffected channel worked for me with most songs. “The Fireside Song” needed a more drastic mix, and “Am I Very Wrong?” couldn’t be reduced much because the secondary vocal line is mixed in with the horn.
It is possible to try to eliminate the strings and horns completely by mixing both channels as the left channel, but the echo of the strings and horns bleeds through and sounds weird, so I wouldn’t recommend it. Besides, this leaves the entire track in mono.
When you have finally gone through every track and channel mixed those obnoxious strings and horns into the background, you can chop up the waveform into individual tracks. I do it by cutting and pasting each track into a new waveform, working forward from the beginning.
And what does this sound like? For obvious reasons I can’t go and post the whole album or even whole songs on the internet, but here are two sample mp3 files containing excerpts.
Listen to those with headphones if you can.
Some extra tips: save frequently. Save an original copy of all audio files. Some of the songs on this album have the bass recorded a little more powerfully than the rest of the album, so EQing the bass a little lower on some tracks might be required for your tastes.